Server Install on Windows
Tableau Server helps you to publish ad support live interactive dashboards and provide high security to your data. The following steps summarize the key install instructions to get the Tabeau server installed on windows.
Tableau Server Components
The Server components of Tableau are as follows:
- Application Server: This process handle browsing and permissions for Tableau Server web and mobile interfaces.
- VizQL Server: Upon request from clients, it sends queries to data source, returns a result set that is rendered as images and ultimately presents them to the users.
- Data Server: It lets users to manage and store Tableau data sources and also maintains metadata (calculations, definitions and groups) from Tableau Desktop.
Tableau Server/Administration
- Installing
- Activating Tableau
- Configuring the Server
- Setting Up Distributed Servers
- Adding Users
Installing Tableau Server:
-
Double-click the installation file.
-
Follow the on-screen instructions to complete Setup and install the application.

The default installation path is
C:\Program Files\Tableau\Tableau Server. You can choose a different location, including a different drive, either by browsing to or typing in a new path.Note: When you upgrade a Tableau Server that's been installed to a non-default location, you need to navigate to that non-default path during the upgrade.
-
After the installation completes, click Next to open the Product Key Manager window.
.jpg)
If you need to support characters that are not the Latin-1 set, install the Windows Language Packs via Control Panel > Regional and Language Options. The language packs will need to be installed on the primary server as well as any worker machines.
Activating Tableau:
After you install Tableau Desktop or Tableau Server, you will need to activate your product. Both of them require product keys to activate the products.
Tableau Server requires at least one product key that both activates the server and also determines the number of license levels which you can assign to users. You can access your product keys from the Tableau Customer Account Center.
Activate and Register: After installing and configuring the server, the product key manager automatically opens so you can enter your product key and register the product. Select Activate and then paste it in your product key.
.jpg)
Offline Activation
If you installed a Tableau’s product on a computer that is offline, you can activate it by completing the following offline-activation process.
When the product key manager opens, click Activate the product.
Paste your server product key into the corresponding text box and click Activate. You can get your product key from the Customer Account Center on Tableau’s web site.
.jpg)
1. When you are offline, activation will fail and you are given the option to save a file that you can use for offline activation. Click Save.
.jpg)
2. Select a location for the file and click Save. The file will be saved as offline.tlq. containing information about the host the license is to be activated on.
.jpg)
Configuring the Server:
The Tabeaue Server Configuration utility opens during a Tableau Server installation. You can set configuration options at this time, as part of the installation, before the server starts.
There are two things to keep in mind about the settings you specify in the Configuration dialog box:
-
Settings are system-wide: The settings you enter apply to the entire server. If the server is running multiple sites, these settings affect every site.
-
User Authentication is "permanent": The User Authentication setting (on the General tab) can only be set when you are installing Tableau Server for the first time. You can change all of the other settings after installation by stopping the server and rerunning the Configuration utility.
The server is started at the end of the installation process.
Server Run As User
By default, Tableau Server runs under the Network Service account. To use an account that will accommodate NT authentication with data sources, specify a user name and password. The user name should include the domain name.

User Authentication
Select whether to use Active Directory to authenticate users on the server. Select Use Local Authentication to create users and assign passwords using Tableau Server's built-in user management system. You cannot switch between Active Directory and Local Authentication later.
Tableau Server supports several types of SSO solutions: OpenID, SAML, and Kerberos. It's important to understand how the decision about whether to use Active Directory or local authentication affects SSO:
- OpenID requires local authentication.
- Kerberos requires Active Directory authentication.
- SAML works with either Active Directory or local authentication. However, if you plan to configure Tableau Server for site-specific SAML authentication, you must select local authentication.

Gateway
The default port for web access to Tableau Server (via HTTP) is port 80.
You may need to change the port for other networking needs, for example, if you have a hardware firewall or proxy in front of the Tableau Server host, this might make running a back-end system on port 80 undesirable.

Firewall
Select whether to open a port in Windows firewall. If you do not open this port, users on other machines may not be able to access the server.
Configure Data Connections
Use the options on the Data Connections tab to configure caching and specify how you want to handle initial SQL statements from data sources.
Caching
Views published to Tableau Server are interactive and sometimes have a live connection to a database. As users interact with the views in a web browser, the data that is queried gets stored in a cache. Subsequent visits will pull the data from this cache if it is available. The Data Connections tab is where you configure aspects of caching that will apply to all data connections:

To configure caching:
- Select the Data Connections tab in the Tableau Server Configuration dialog box.
- Select from one of the following options:
Refresh Less Often – Data is cached and reused whenever it is available regardless of when it was added to the cache. This option minimizes the number of queries sent to the database. Select this option when data are not changing frequently. Refreshing less often may enhance the performance.
Balanced – Data is removed from the cache after a specified number of minutes. If the data has been added to the cache within the specified time range, the cached data will be used, otherwise new data will be queried from the database.
Refresh More Often – The database is queried each time the page is loaded. The data is still cached and will be reused until the user reloads the page. This option will ensure users see the most up to date data; however, it may decrease performance.
To disable initial SQL functionality, select the Ignore initial SQL statements for all data sourcescheck box. Workbooks created with initial SQL statements will still open but the initial SQL commands will not be sent.
Servers
Use the options on the Servers tab to do the following:
-
Adjust the number of processes running on Tableau Server,
-
Configure a distributed Tableau Server environment, and
-
Select the preferred active repository for failover situations.
You can also use the Server tab to add computers on which to run Tableau Server processes.

Number of processes per server
Tableau Server deployments run multiple processes. You can choose to run the processes one computer, or to distribute them across multiple computers. To improve performance, you can adjust the number of processes that run on each computer, for each process type.
Configure SMTP Setup
Tableau Server can email server administrators about system failures, and email server users about subscribed views and data-driven alerts. First, however, you need to configure the SMTP server that Tableau Server uses to send email.
- In the Tableau Server Configuration utility, click the SMTP Setup tab.
-
Under SMTP Server:
-
Enter the name of your SMTP server.
-
(Optional) If your account requires it, enter a user name and password for your SMTP server account.
-
If you are not using the default SMTP port 25, change the SMTP port value.
-
Uncheck Enable TLS so the connection to your mail server is unencrypted. (Encrypted SMTP connections are not supported for alerts or subscriptions.)

-
-
For Send email from, enter the email address that will send an alert if there's a system failure. The email address must have valid syntax (for example, ITalerts@bigco.com or noreply@mycompany), but it does not have to be an actual email account on Tableau Server. (Some SMTP servers may require an actual email account, however.)
For Send email to, enter at least one email address that will receive the alerts. If you enter multiple addresses, separate them with commas.
-
For Tableau Server URL, enter
http://orhttps://, followed by the name or IP address of the Tableau server. This value will be used for the footer of subscription emails. -
Click OK.
When you start server, it will trigger an email alert. This confirms that you have set up alerts correctly.
Setup Tasks
The eventual step in activating Tableau Server is to add an administrator account.
If you are using Local Authentication, create an administrative account by typing a Username, Display Name, and a Password (twice) of your choosing. Then click Add user.

Setting Up Distributed Servers:
After you complete the initial configuration, you can set up Tableau Server to run on multiple computers. This is also called as distributed installation, or cluster. It increases the scalability of your Tableau Server environment.
- You can set up Tableau Server to run on multiple machines and you can fine tune which Tableau Server processes can run on individual machines, including the primary server.
- This type of distributed environment can help you support more users, improve viewer interaction and browsing, as well as optimize the handling of server background tasks.
.jpg)
Once the Worker software is installed on worker machines, return to the primary server and open the configuration utility by selecting Tableau Server 8 > Configure Tableau Server on the Start menu.
In the Configuration Utility, select the Servers tab and click the Add button.
.jpg)
In the next dialog box, type the IP Address for one of the worker machines and indicate the number of VizQL, Application Server, and Background processes allocate to the machine.
.jpg)
Adding Local Users:
- You can add individual users’ information and then import several users from a Comma-Separated Value (CSV) file. You can also include attributes in the CSV file, such as site role and the ability to publish, to apply to the users at the same time to import them.
To add local users:
1. Log into Tableau Server by entering your administrator user name and password.
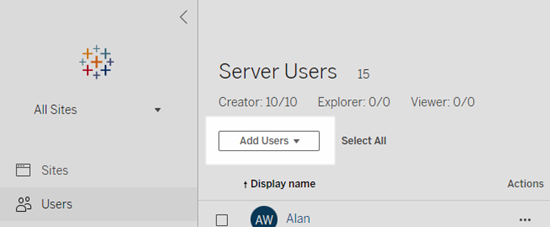
2. Click Users in the Administration area on the left side of the page
.jpg)
3. Click one of the following links at the undermost list of users:
Add User – To add users one at a time by specifying a user name and password.
Add Users From CSV File – To add multiple users accommodated in a CSV file.

4. If you are adding a single user, specify the following:

Username – Type a username for the user (e.g., jsmith, johnsmith). The username can only consist of letters and numbers.
- Full Name – Type a display name for the user (e.g., John Smith).
- Password – Enter a password for the user.
- Confirm – Retype the password to confirm.
- License Level – Select a license level.
User Rights – Choose whether the user can publish workbooks and assign administrator rights.
When accomplished, click Add User.
To add a user to the server
-
In the site menu, click Manage All Sites, click Users, and then click Add Users.
-
If you are using local authentication, click New User. If you are using Active Directory, click Active Directory User.
Enter a user name.
-
Local authentication: If the server is using local authentication, using an email address for the user name is the best way to avoid user name collisions (for example, jsmith@example.com instead of jsmith).
-
Active Directory: If you are adding a user that is from the same Active Directory domain that the server is running on, you can type the AD user name without the domain. The server domain will be assumed.
Note: Do not enter the user's full name in this field; it can cause errors during the importing process.
-
-
If the server is using local authentication, provide the following:
-
Display Name—Type a display name for the user (e.g., John Smith).
-
Password—Type a password for the user.
-
Confirm password—Retype the password.
-
Email—This is optional and can be added at a later time in the user profile settings.
-
Selected users are Server Administrators: Specify whether the user should be a server administrator as in the screenshot above.
-
Name (Site Membership) / Site Role: If the user is not a server administrator, you can assign a user to zero or more sites, along with a site role for each site. You do not have to choose site membership and site role at this time. If you don't specify site membership and site role for a new server user, the user will be added as a Server User only, with a site role of Unlicensed.
-
Server Install on Linux
The following steps will install an instance of Tableau Server for Linux with the following characteristics:
- Operating system: Ubuntu
- Identity store: local authentication
- Gateway port: 80
- Tableau Server administrator account: admin
Before you begin
The computer you install on must meet the minimum hardware requirements. The setup program will not install Tableau Server onto systems that do not meet the minimum hardware requirements.
Step 1: Install Tableau Server package and start Tableau Services Manager
Install Tableau Server with your distribution’s package manager, then run a script to initialize Tableau Services Manager (TSM). Tableau Services Manager is a the management toolset used to install, configure, and manage Tableau services.
The initialize script is included with the installed package.
-
Log on as a user with sudo access to the computer where you want to install Tableau Server.
-
Navigate to the directory where you copied the Tableau Server installation package.
-
Use the package manager to install the Tableau Server package.
-
On Ubuntu, run the following command:
sudo apt-get update
sudo apt-get -y install gdebi-core
sudo gdebi -n tableau-server-<version>_amd64.deb
-
-
Navigate to the
scriptsdirectory:cd/opt/tableau/tableau_server/packages/scripts.<version>/ -
Run the following script to start TSM:
sudo ./initialize-tsm --accepteula -
After initialization is complete, close the terminal session:
exitorlogout
Step 2: Activate and register Tableau Server
Before you can configure Tableau Server you must activate a license and register.
-
Log on as a user with sudo access and log in to TSM. Run the following command:
tsm login -u <username> -
Activate the Tableau Server license. Run the following command:
tsm licenses activate -k <license_key> -
Register Tableau Server. Generate a template that you can edit by running the following command:
tsm register --template > /path/to/registration_file.json -
Open a text editing program, fill in the registration file, save it, then pass it with the following command:
tsm register --file /path/to/registration_file.json
Step 3: Configure local identity store
You must configure the identity store settings. This procedure simplifies installation setting identity store to local authentication. Workbook examples are installed by default.
-
Pass the configuration file with the following command:
tsm settings import -f /opt/tableau/tableau_server/packages/scripts.<version>/config.json
Step 4: Finalize installation
The final steps of installation are to apply changes, initialize and start TSM, and then to create the administration account.
-
Apply the configurations you made in the previous steps. Run the following command:
tsm pending-changes apply -
Initialize and start Tableau Server. Run the following command:
tsm initialize --start-server --request-timeout 1800 -
Create the Tableau Server administrator account. Run the following command:
tabcmd initialuser --server 'localhost:80' --username 'admin' --password '<password>'Where
'<password>'is a strong password.
Use the admin account that you created to access the Tableau Server admin web pages.
Step 5: Validate your installation (optional)
A good way to validate that Tableau Server is installed and running properly is to look at the built-in administrative views.
-
Download PostgreSQL drivers from the prerelease site.
-
Install the drivers on your Tableau Server computer:
-
On Ubuntu, download the .deb file and then run the following command:
sudo dpkg -i tableau-postgresql-odbc_9.5.3_amd64.deb
-
-
To validate that the drivers installed, navigate to the Administrative Views in Tableau Server.